
Five custom fields every project manager should set up first
Every project management tool gives you status and assignee. But those two fields rarely tell the full story. Priority, effort, project phase. That information ends up in descriptions, comments or side spreadsheets where nobody can filter or sort it.
TL;DR: Start with five custom fields: priority, effort estimate, project phase, feature area and deadline status. All single-select with colors. They cover most workflow needs, take minutes to set up and work across board, grid and list views.
What are custom fields in project management?
Custom fields in project management are structured data points you add to issues beyond the defaults like status and assignee. They let you capture workflow-specific information (priorities, effort estimates, project phases) in a way that's filterable, sortable and visible on your cards.
Most teams need this kind of data. The question is whether it lives in a structured field or scattered across descriptions and comments. When it's structured, you can filter your board by priority, sort your list by effort and group your grid by feature area. When it's not, you're reading through cards one by one to find what you need.
This post picks five fields that cover most project management workflows. Not every field type your tool offers. Just the five you'll actually use.
Why should project managers set up custom fields before starting work?
Setting up fields before you create issues saves you from going back through every existing card later. When fields are in place from day one, every issue gets the right metadata as it's created. You build habits around filling in priority and effort from the start rather than trying to retrofit data weeks into the project.
The goal is "just enough" structured data to make work ready without creating overhead. Five fields covers most workflows. You don't need fifteen fields capturing every possible attribute. You need the five that your team will actually fill in and use for decisions.
Which five custom fields should you set up first?
These five fields are all single-select type. Single-select fields give you predefined options, colored badges on cards and the ability to filter and group by value. They're the most useful field type for workflow management because they enforce consistency while staying fast to fill in.
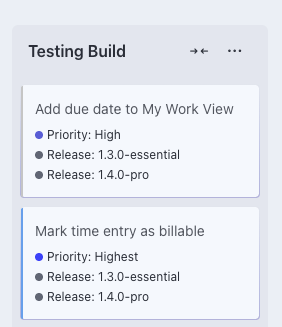
1. Priority
Options: Low, Medium, High, Urgent
Priority is the most universally useful custom field. Every team needs a way to distinguish what needs attention now from what can wait. Without a priority field, everything looks equally important on the board.
The value isn't just in marking things as urgent. It's in being able to filter your board to show only High and Urgent items when you need to focus. On a grid view, priority badges on each card let you scan workload and urgency across status columns and assignee rows at once.
Use colors that match intuition: green for Low, yellow for Medium, orange for High, red for Urgent. When someone scans the board, the colors tell the story before they read a word.
2. Effort estimate
Options: S, M, L, XL
Agile practitioners recommend relative sizing over absolute time-based estimates. T-shirt sizes (Small, Medium, Large, Extra-Large) remind teams that estimates are approximations, not commitments. They prevent the false precision that comes with estimating in hours.
An effort field helps you spot problems early. If your sprint is full of L and XL items, you're probably overcommitting. If your board has ten S items and one XL, the XL is the risk you should plan around.
T-shirt sizes also make estimation faster. Teams spend less time debating whether something is 3 hours or 4 hours and more time agreeing on relative size. "Is this bigger or smaller than the auth work we did last sprint?" is a quicker conversation than "how many hours will this take?" For a deeper dive into estimation approaches beyond story points, see the guide on simple work estimation without story points.
3. Project phase
Options: Discovery, Design, Development, Review (adapt to your workflow)
Project phase tracks where work sits in the bigger picture. It's different from status. Status tells you what's happening to a specific card right now (In Progress, In Review). Phase tells you which part of the project the card belongs to.
This distinction matters when a project has multiple phases running in parallel. Your team might have some issues in the Design phase while others are already in Development. Filtering by phase lets you focus on one slice of the project at a time.
Phase fields are especially useful on the timeline view, where phase badges on timeline entries let you see what kind of work is happening in each time period.
4. Feature area
Options: varies per project (e.g. Auth, Payments, Dashboard, API, Onboarding)
Feature area groups issues by what part of the product or deliverable they affect. When you're looking at a board with 30 cards, knowing which feature area each one belongs to helps you see what's getting attention and what's being neglected.
On a grid view grouped by status and assignee, feature area badges on each card help you spot which parts of the product are getting attention. That's a useful detail layer during planning meetings or retrospectives. Learn more about this in the guide on matrix views and swimlanes.
Feature area also helps when multiple team members work on the same project. Filter the board to your feature area and focus on what's relevant to you.
5. Deadline status
Options: On Track, At Risk, Overdue
Deadline status is a manual signal, not an automatic calculation. You update it based on your judgment about whether a piece of work will hit its target date. This is more useful than automatic deadline highlighting because it captures context that dates alone can't.
A card might be "due Friday" but you know the developer is ahead of schedule. That's On Track. Another card might be "due next week" but the dependency it needs hasn't shipped yet. That's At Risk. The field captures your judgment, not just arithmetic.
Use strong colors here: green for On Track, yellow for At Risk, red for Overdue. When you scan the board, red badges jump out immediately.
How do these custom fields work across board, grid and list views?
The same five fields show up differently depending on the view you're using. On boards, they appear as colored badges on cards so you can scan priorities and deadline statuses at a glance. On grids, fields appear as badges on cards within each cell, adding detail on top of the grid's status, assignee or label grouping. On lists, fields become sortable and filterable columns.
The data you enter once works everywhere. Set a card's priority to High and it gets an orange badge on the board, sorts to the top of the list and appears in the right cell on the grid. No re-entry needed.
Each field answers a different question about the work. Together they let you scan a board and understand what's happening without opening individual cards.
Worked example: setting up fields for a product launch project
A product team is planning a launch for their new dashboard feature. The project has about 40 issues spanning design, frontend, backend API work and QA.
The five fields they create:
| Field | Type | Options |
|---|---|---|
| Priority | Single-select | Low, Medium, High, Urgent |
| Effort | Single-select | S, M, L, XL |
| Phase | Single-select | Design, Frontend, Backend, QA |
| Feature area | Single-select | Charts, Filters, Data Export, Layout |
| Deadline status | Single-select | On Track, At Risk, Overdue |
How they use the board: Cards show Priority and Deadline Status badges. The lead scans the board each morning. Red badges get attention first. If a card shows "Urgent" priority with "At Risk" deadline, that's the first conversation of the day.
How they use the grid: During weekly planning, they switch to grid view with Status on the columns and Assignee on the rows. Each card shows Priority and Effort badges. They can see that one developer has four items in progress, all tagged Urgent, while another has two Low-priority items. The grid makes workload imbalances visible without counting cards manually.
How they use the list: When the team lead writes the weekly update, they filter the list by Deadline Status = "At Risk" and sort by Priority descending. That gives them the items to escalate.
The setup took about five minutes. The fields started paying off during the first standup.
What's the best approach to custom field colors?
Use colors that carry consistent meaning across fields. Red should always mean "needs attention" whether it's an Urgent priority or an Overdue deadline. Green should mean "low concern." Yellow sits in between.
Keep your color choices intuitive. Don't use green for Urgent or red for Low. People scan based on color before reading the label. If the colors contradict the meaning, the badges create confusion instead of clarity.
Eigenfocus lets you pick colors for each option in a single-select field. You set them once when you create the field and they show as colored badges on cards across all views.
How do you set up custom fields in Eigenfocus?
In Eigenfocus, custom fields are per-project. You create them in project settings and they immediately appear on your cards. No global configuration, no admin permissions, no field schemes that affect other projects.
The setup is straightforward:
- Open your project settings
- Add a new custom field
- Pick single-select as the field type
- Define your options and assign colors
- The field shows up on your cards right away
Each project defines its own fields independently. Your product launch project can have different fields than your marketing campaign project. This keeps each project's metadata relevant to its own workflow.
Common questions about custom fields for project managers
Should I use text fields or single-select fields?
Single-select fields are better for data you want to filter, group or sort by. Text fields work well for free-form information like client names or reference notes. For the five fields recommended in this post, single-select is the right choice because you want consistent, predefined values across all issues.
How many custom fields should a project have?
Five is a good starting point. Add more only when you notice a gap in how you filter or organize work. If you can't explain how a field helps you make decisions, you probably don't need it. Fields that nobody fills in are worse than no fields because they clutter the interface without adding value.
Can I change custom field options after creating them?
Yes. You can add, rename or reorder options at any time without losing data. Existing issues keep their current values. If you rename "Medium" to "Mid," all cards tagged "Medium" update automatically. This makes it safe to start with your best guess and adjust as you learn what works.
Do I need different custom fields for each project?
It depends on the type of work. Similar projects can share the same field structure. Different types of work often need different fields. In Eigenfocus, fields are per-project, so each project defines what's relevant to it. If you run similar projects often, you can clone a project to carry your field setup forward.
What's the difference between custom fields and custom statuses?
Custom statuses define the workflow stages a card moves through (Backlog, In Development, In Review, Done). Custom fields add metadata that describes the card itself: priority, effort, feature area. You use both together. Statuses tell you where work is in the process and fields tell you what kind of work it is. Learn more in the guide on custom statuses in project management.
Get started with custom fields
Set up five fields in under a minute, per project, with no admin overhead.
You can also read about how teams use Eigenfocus for project management or for software development.